Diagrams of Court Positioning, Shading, and Available Angles of Attack
Higher level play is not about the ability to anticipate where the ball’s going to be hit to. It’s about proper court positioning at any given moment, so that you’re in the best position to respond effectively.
Even if your opponent is able to hit a low percentage shot successfully, don’t abandon this strategy as your opponent is unlikely to be able to do that over and over. You should actually use good court positioning to force them to try low percentage shots. This results in more points over time.
The images below are meant to supplement my on-court instruction. They are courtesy of the Primetime Pickleball online course Dominating Doubles.
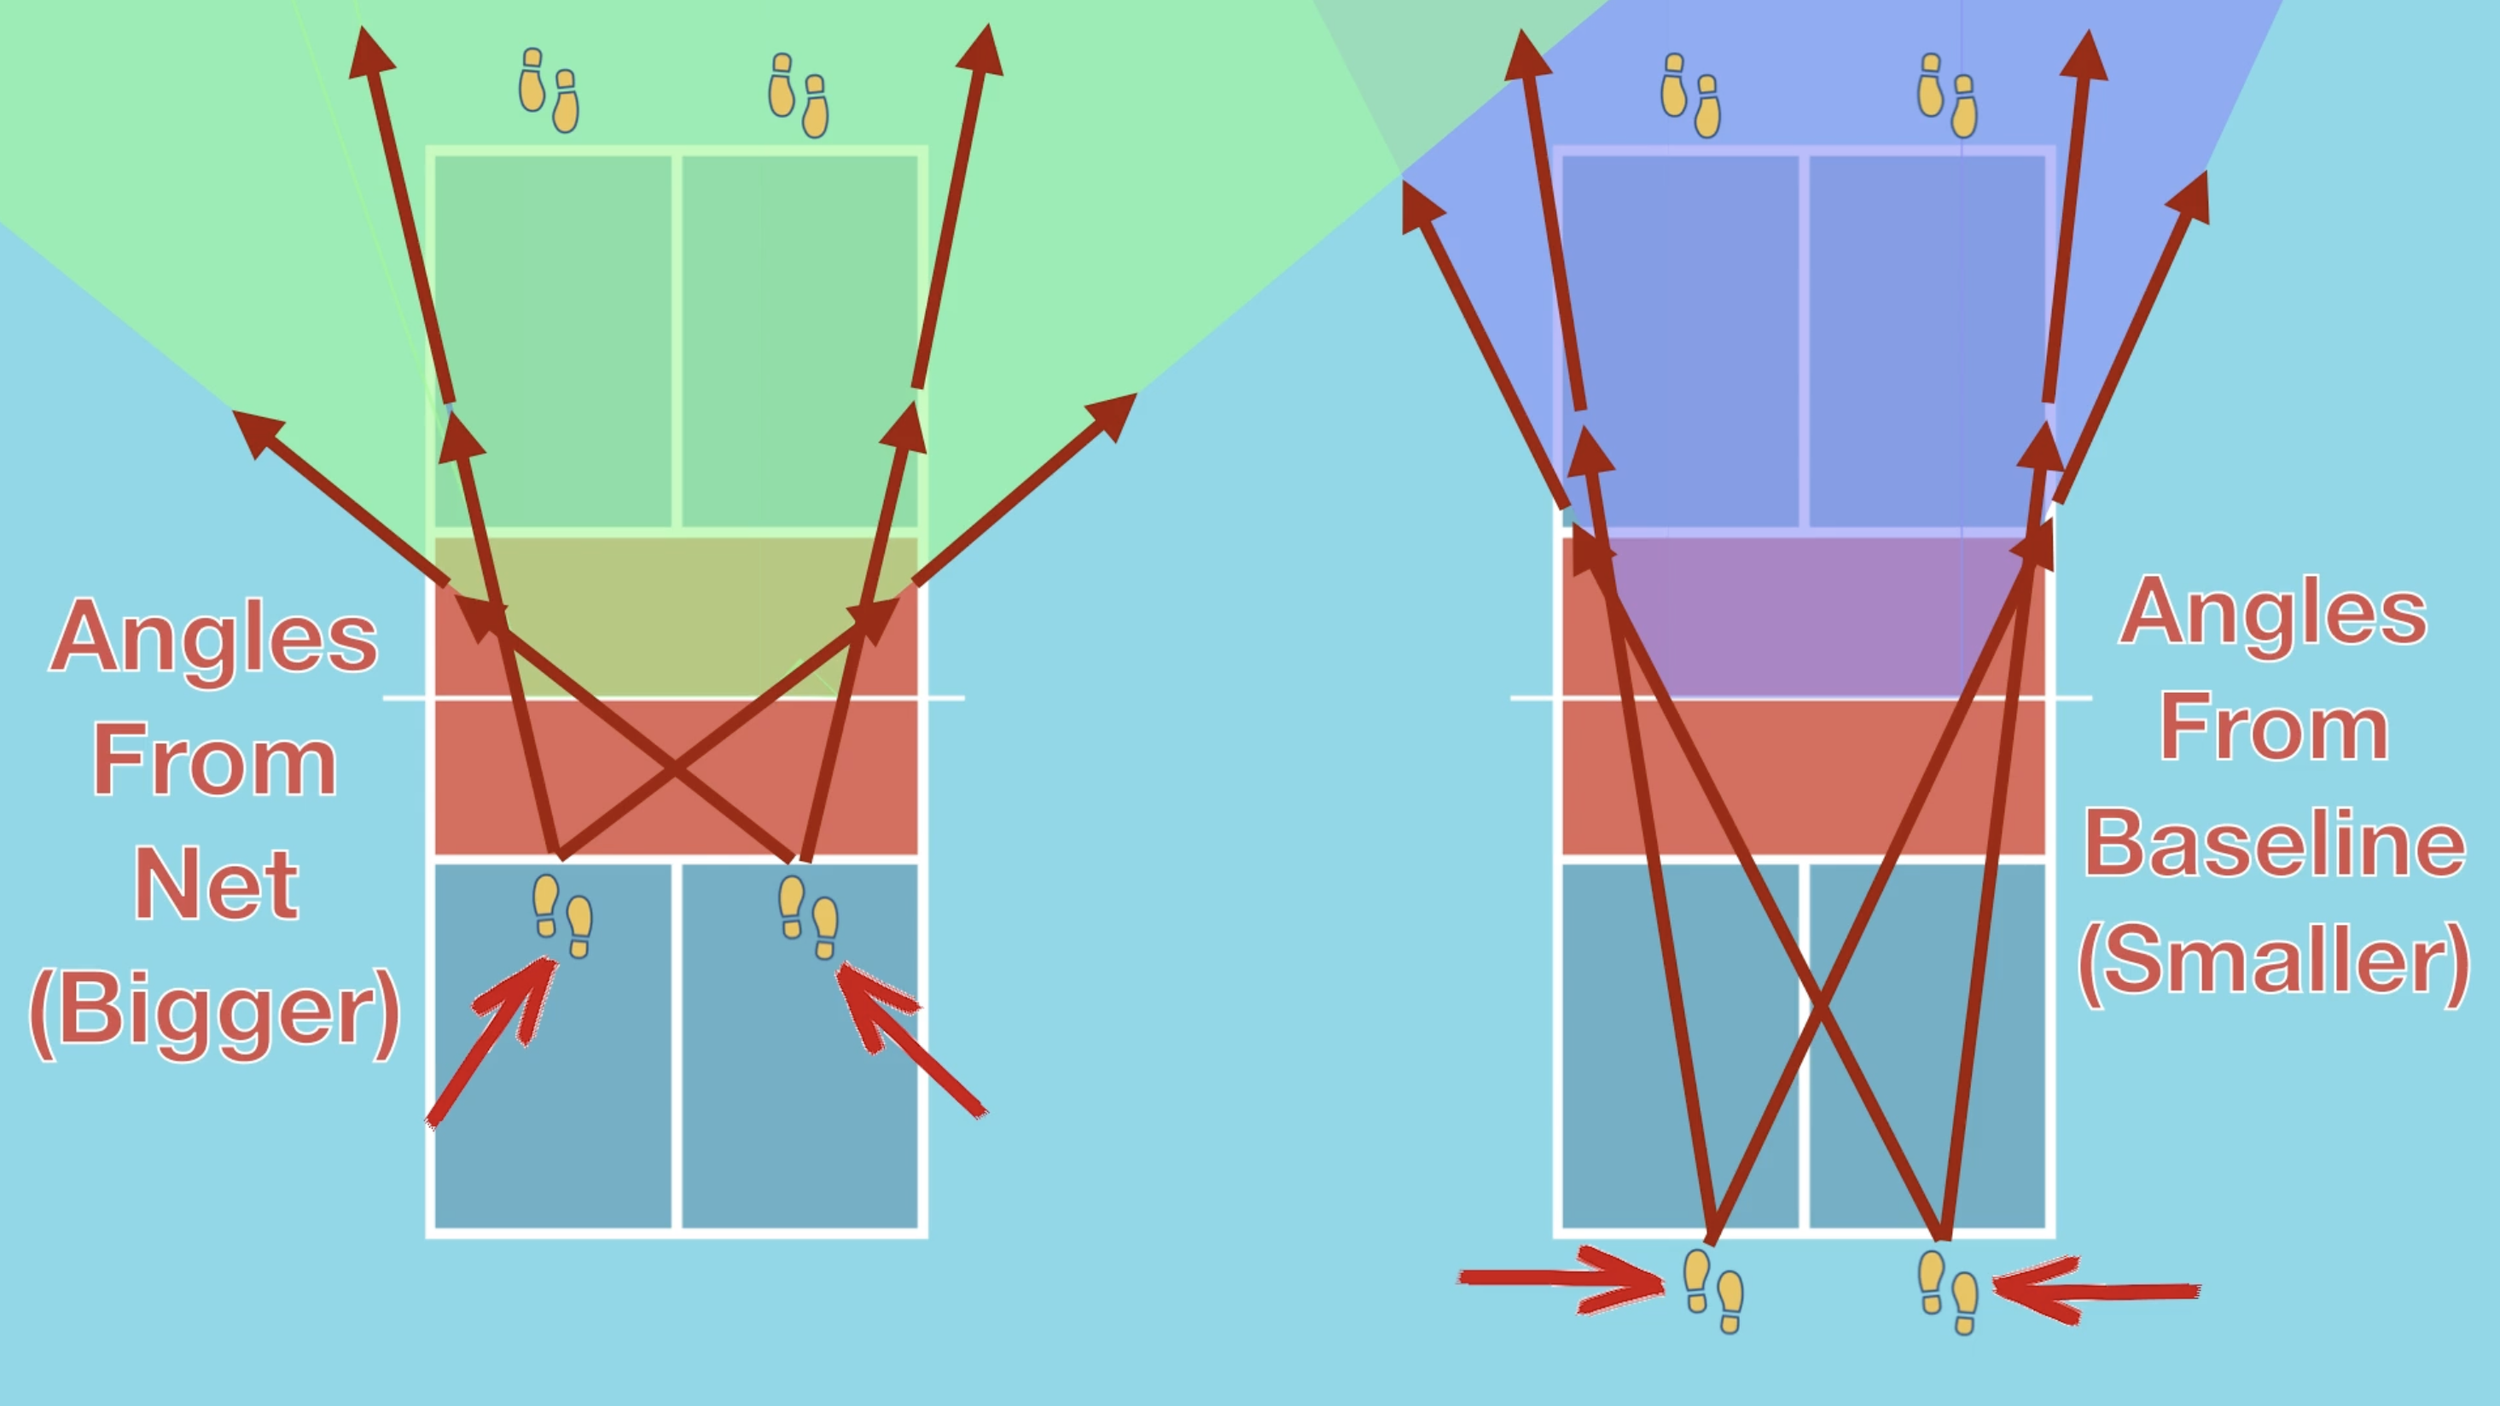
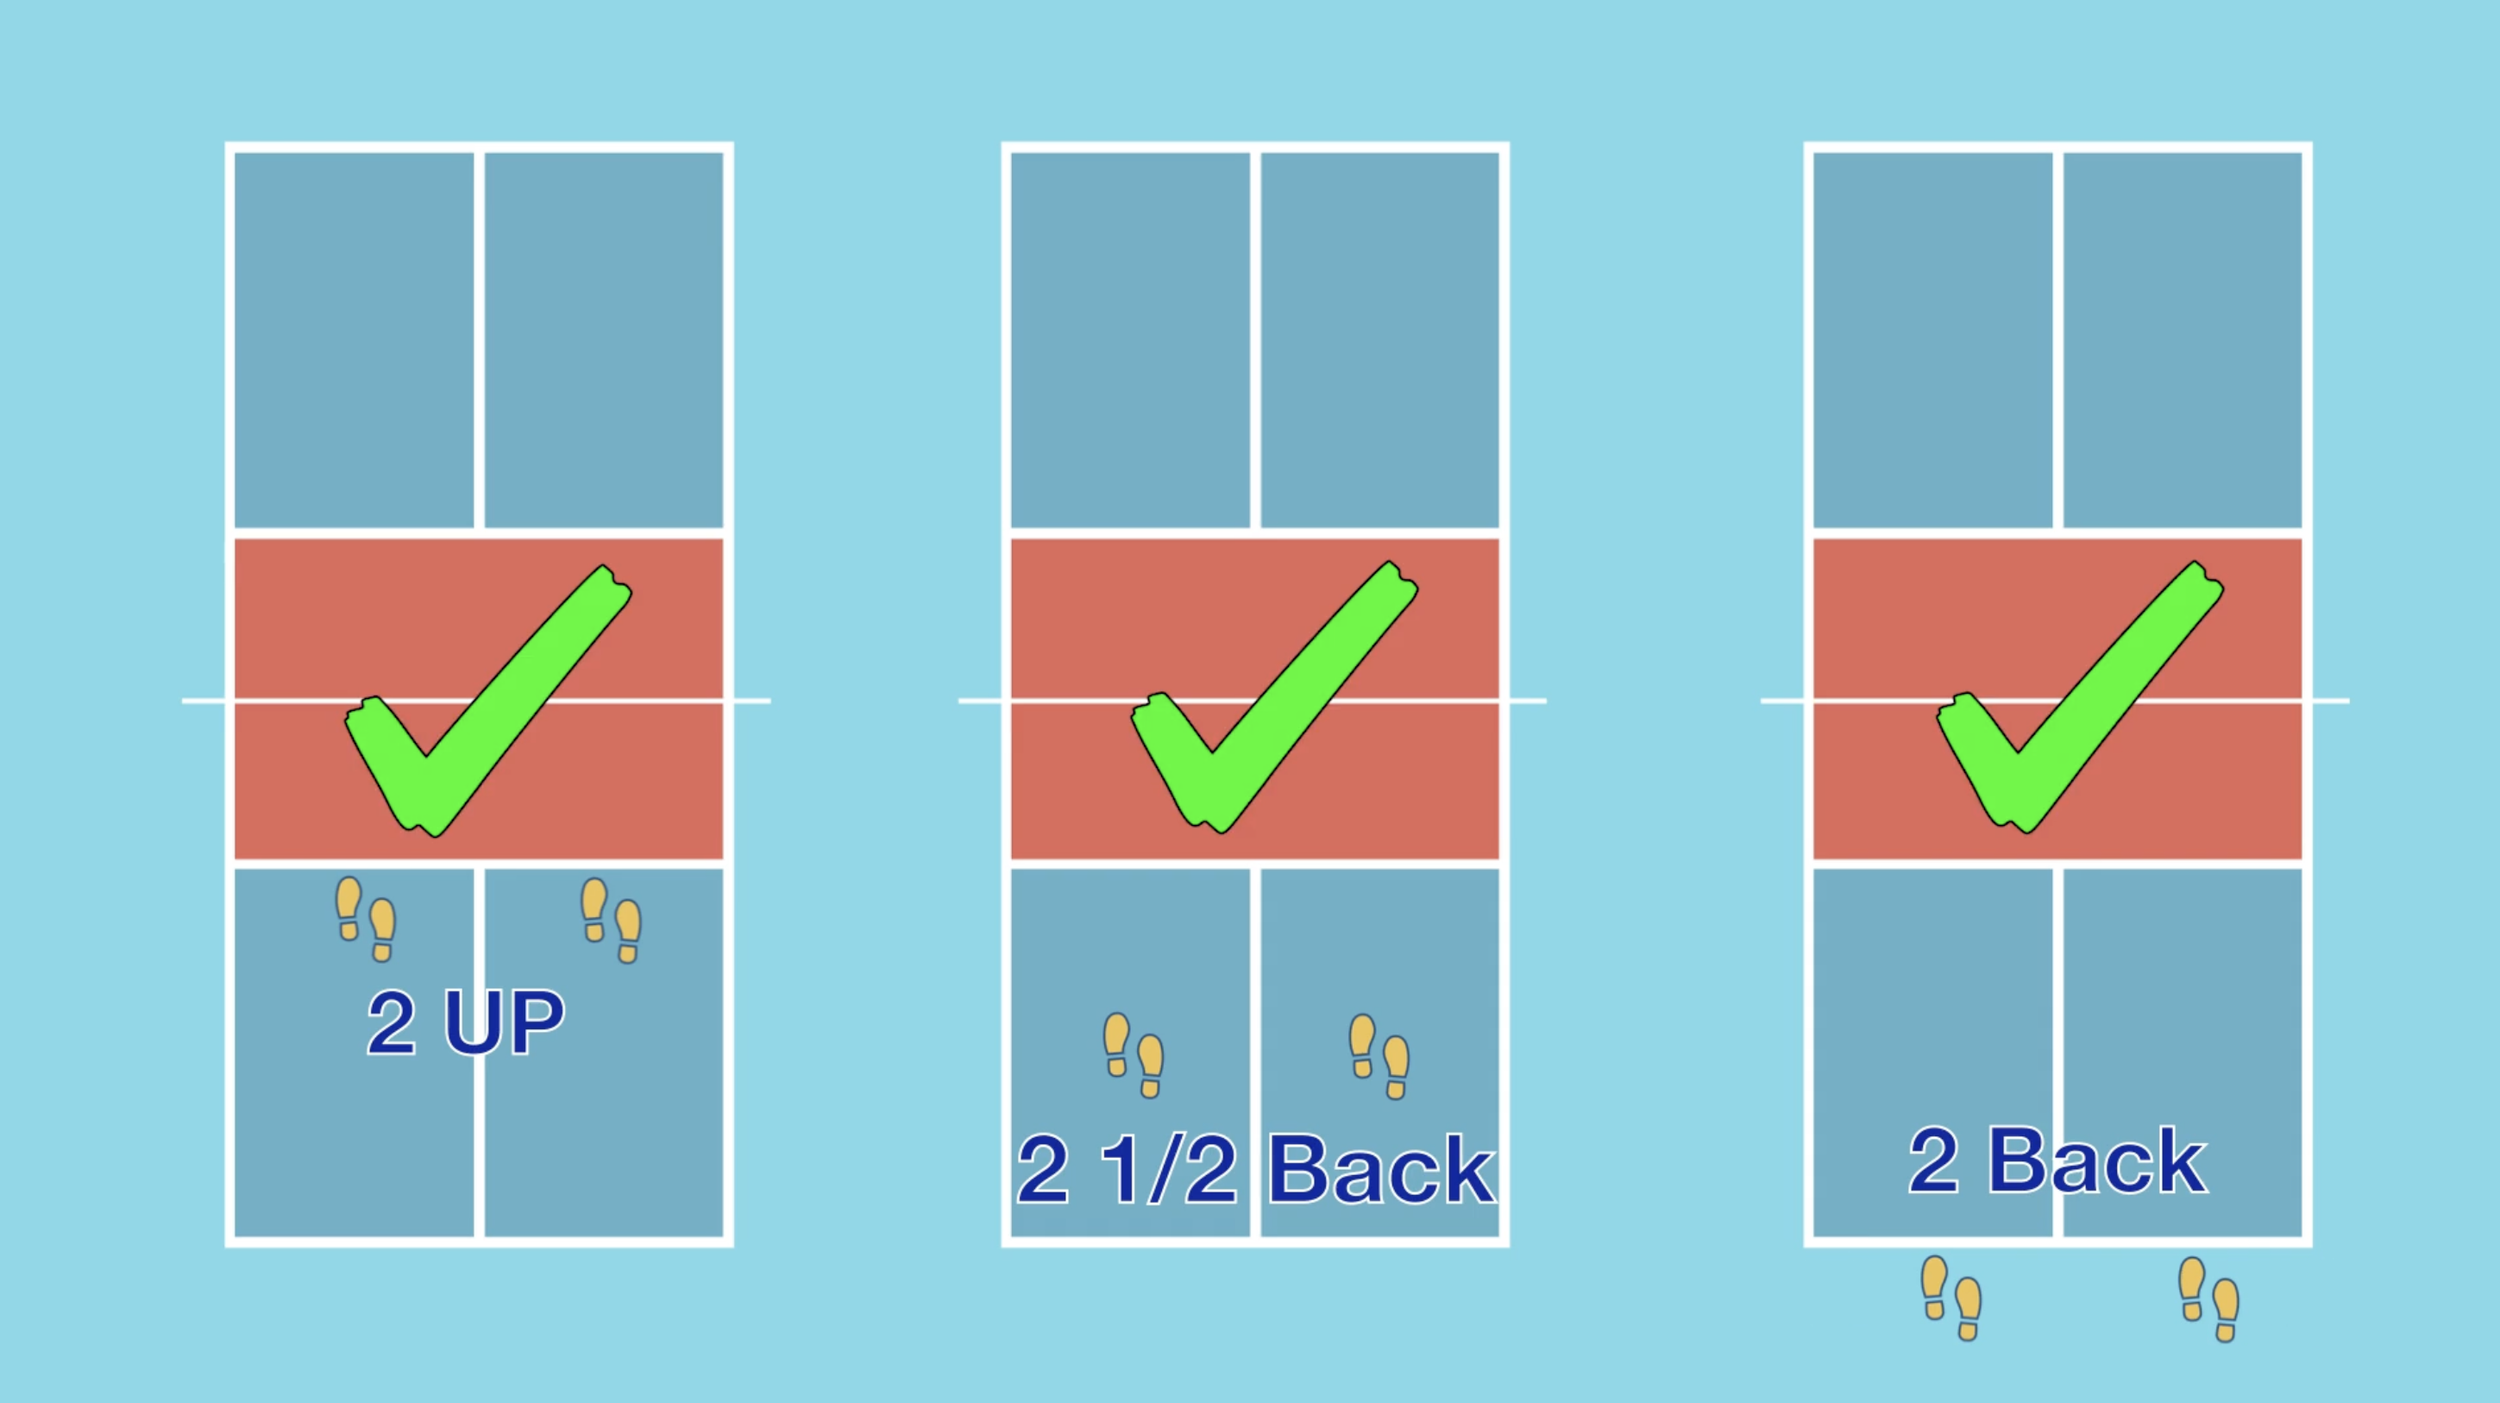
Playing from the kitchen takes time away from your opponent, and it also opens up more angles of attack for you to finish the point.
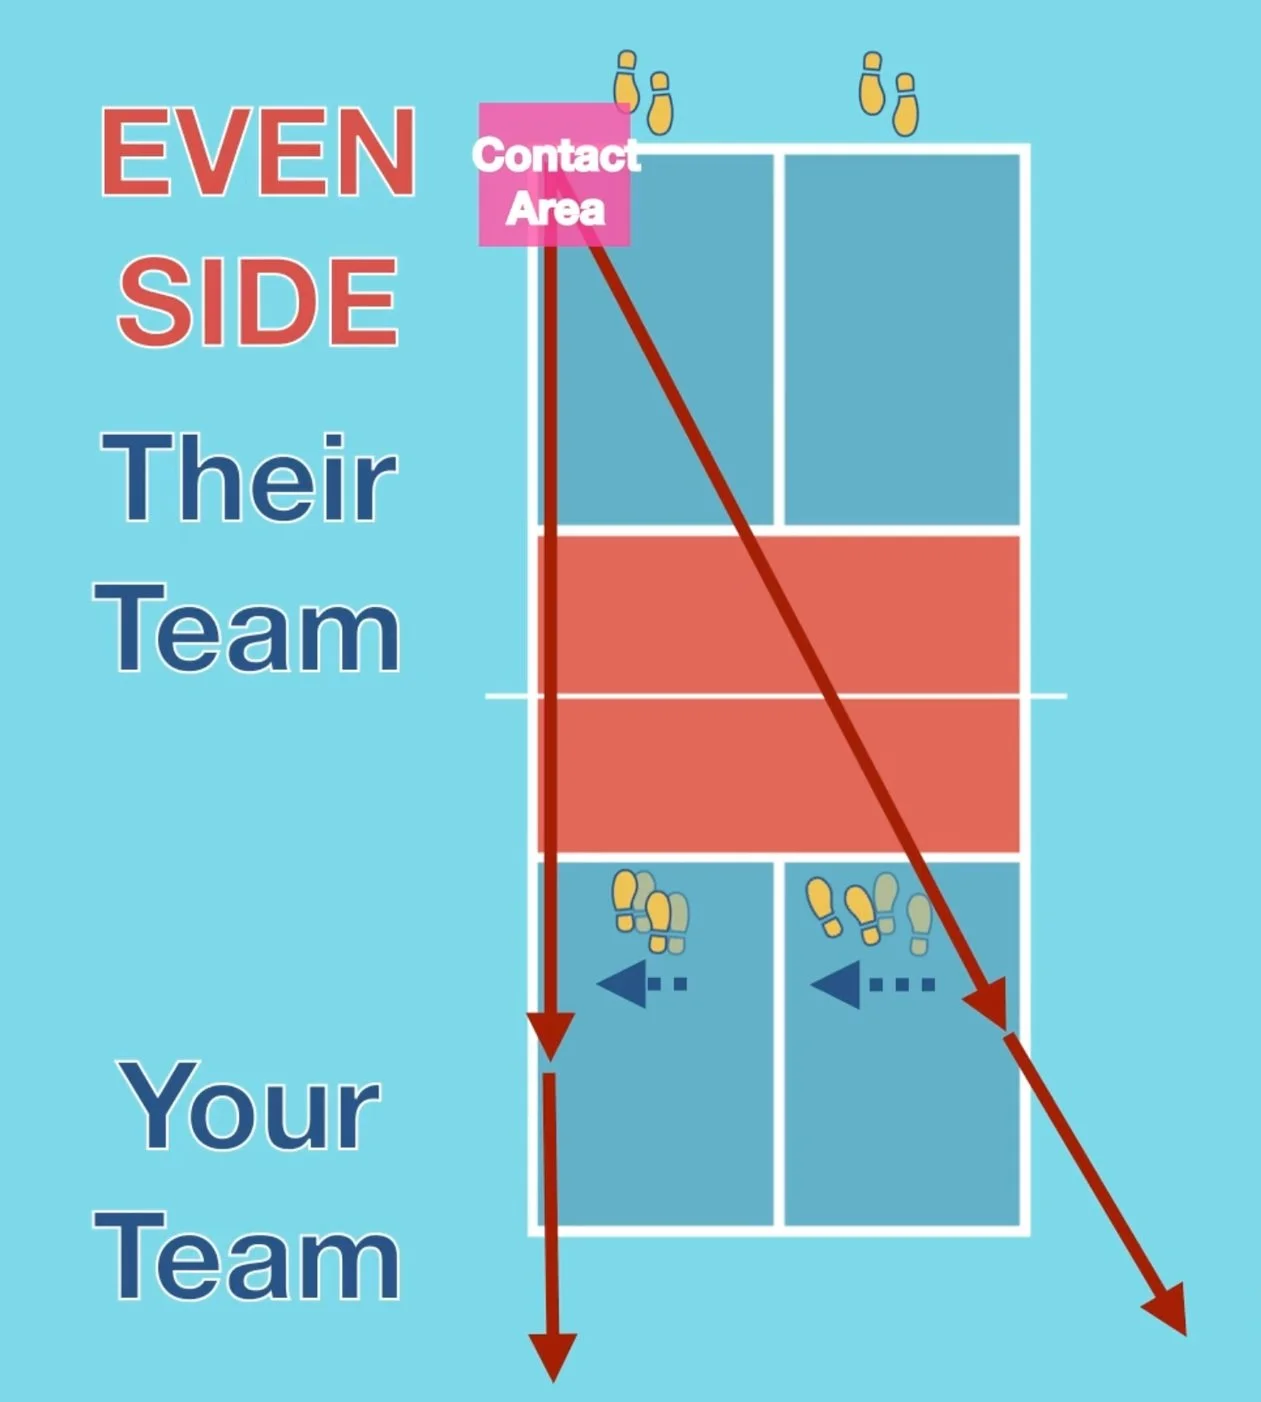
When you’re at the non-volley-zone line and the opposing team is at the baseline - shift your team’s position toward the side of the court where your opponent is returning the ball from - just enough to adequately cover the down-the-line shot, while maintaining coverage of the centre of the court.
When the opponent is at the NVZ line and your team is at the baseline, shift over slightly to the opposite side of where the ball is coming from.
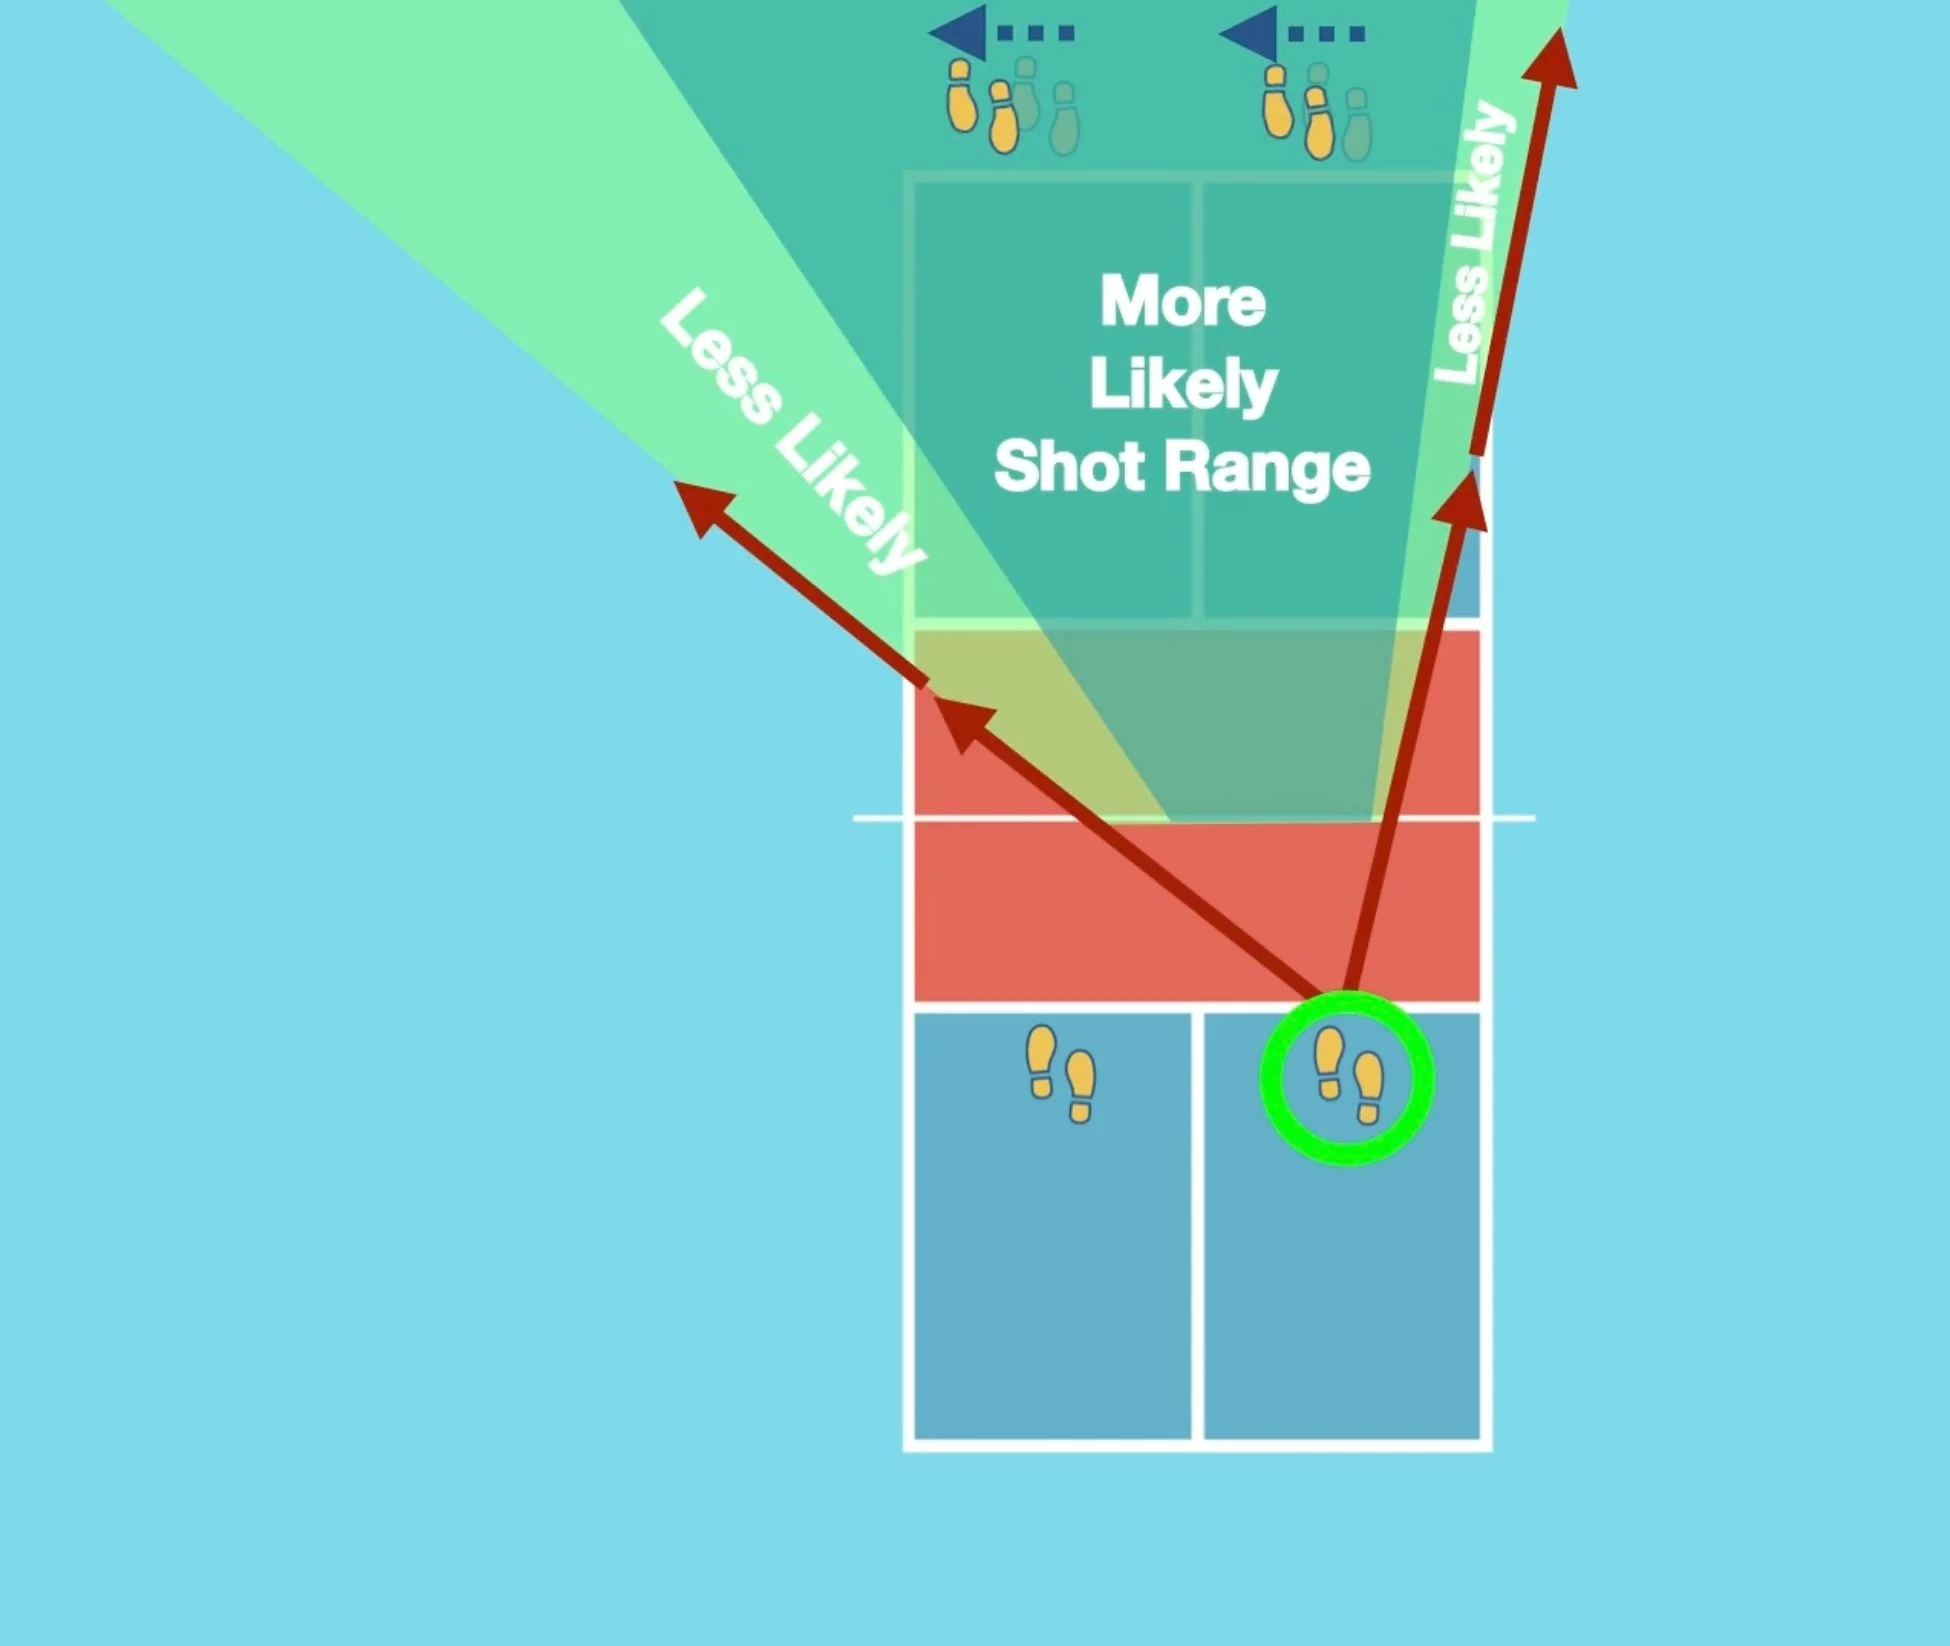
When the opponent is going to return the ball from the middle of their court, squeeze the centre as that’s where the ball is likely going to go. This helps address the dreaded middle-ball that nobody swings at, and puts pressure on your opponent to attempt a lower percentage shot.
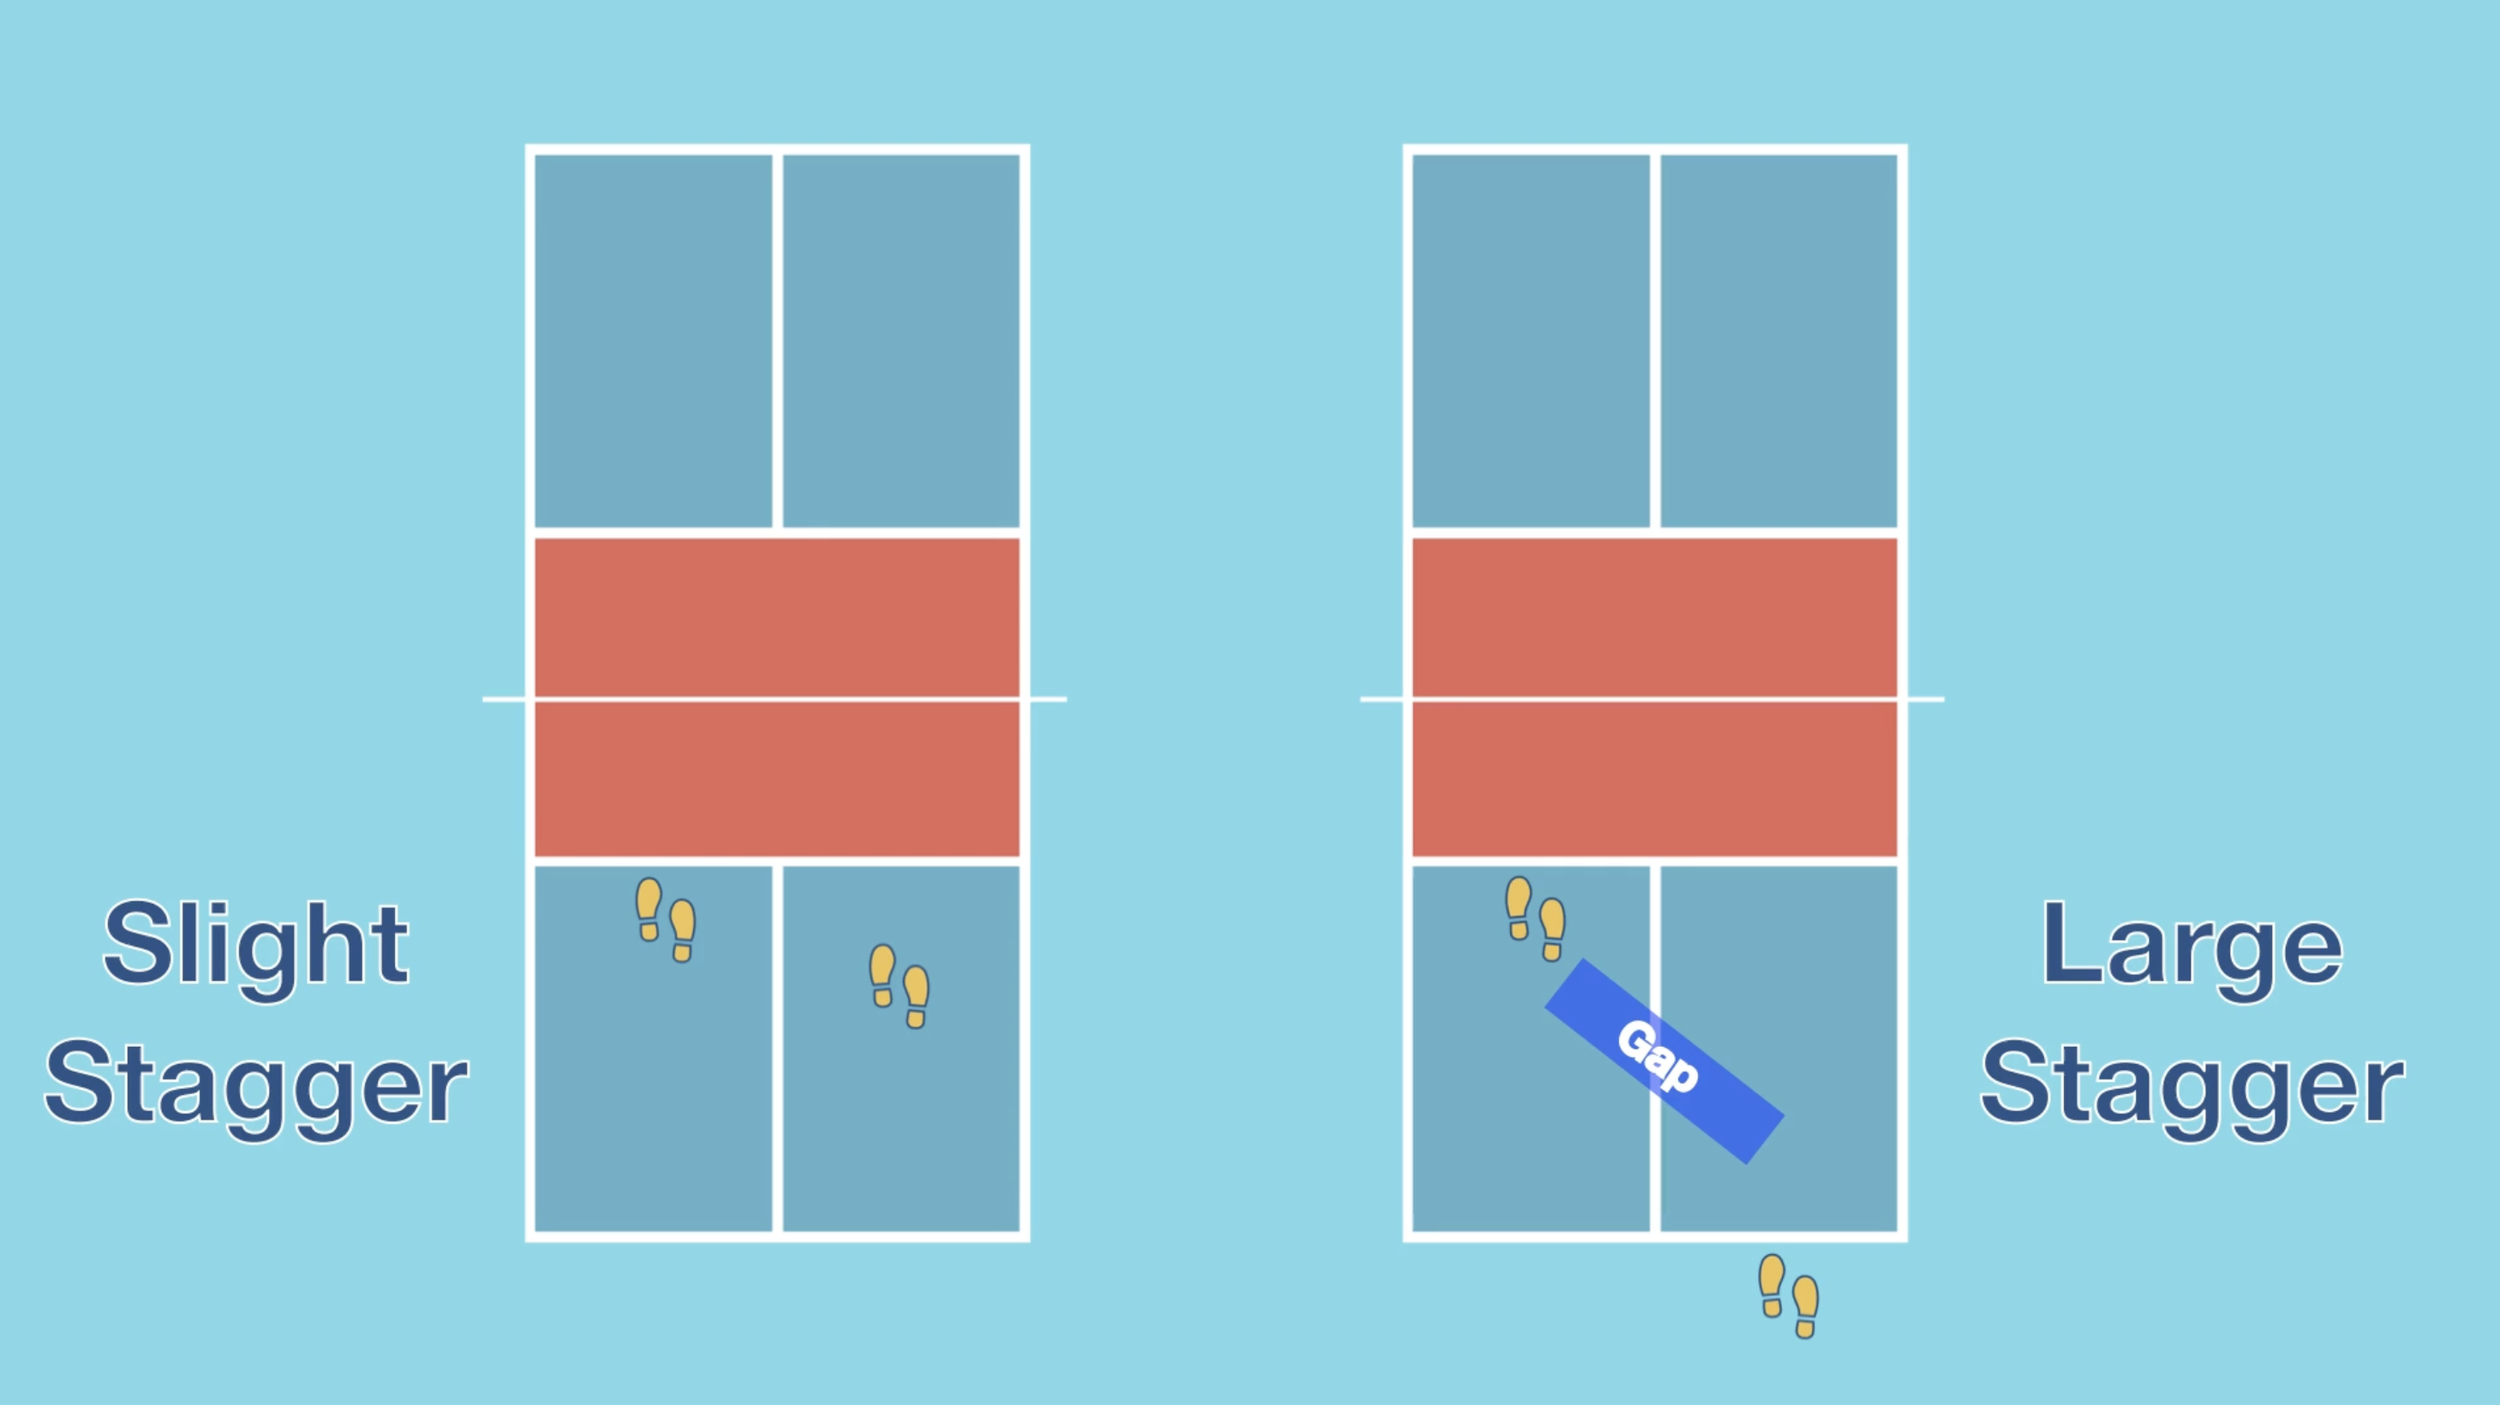
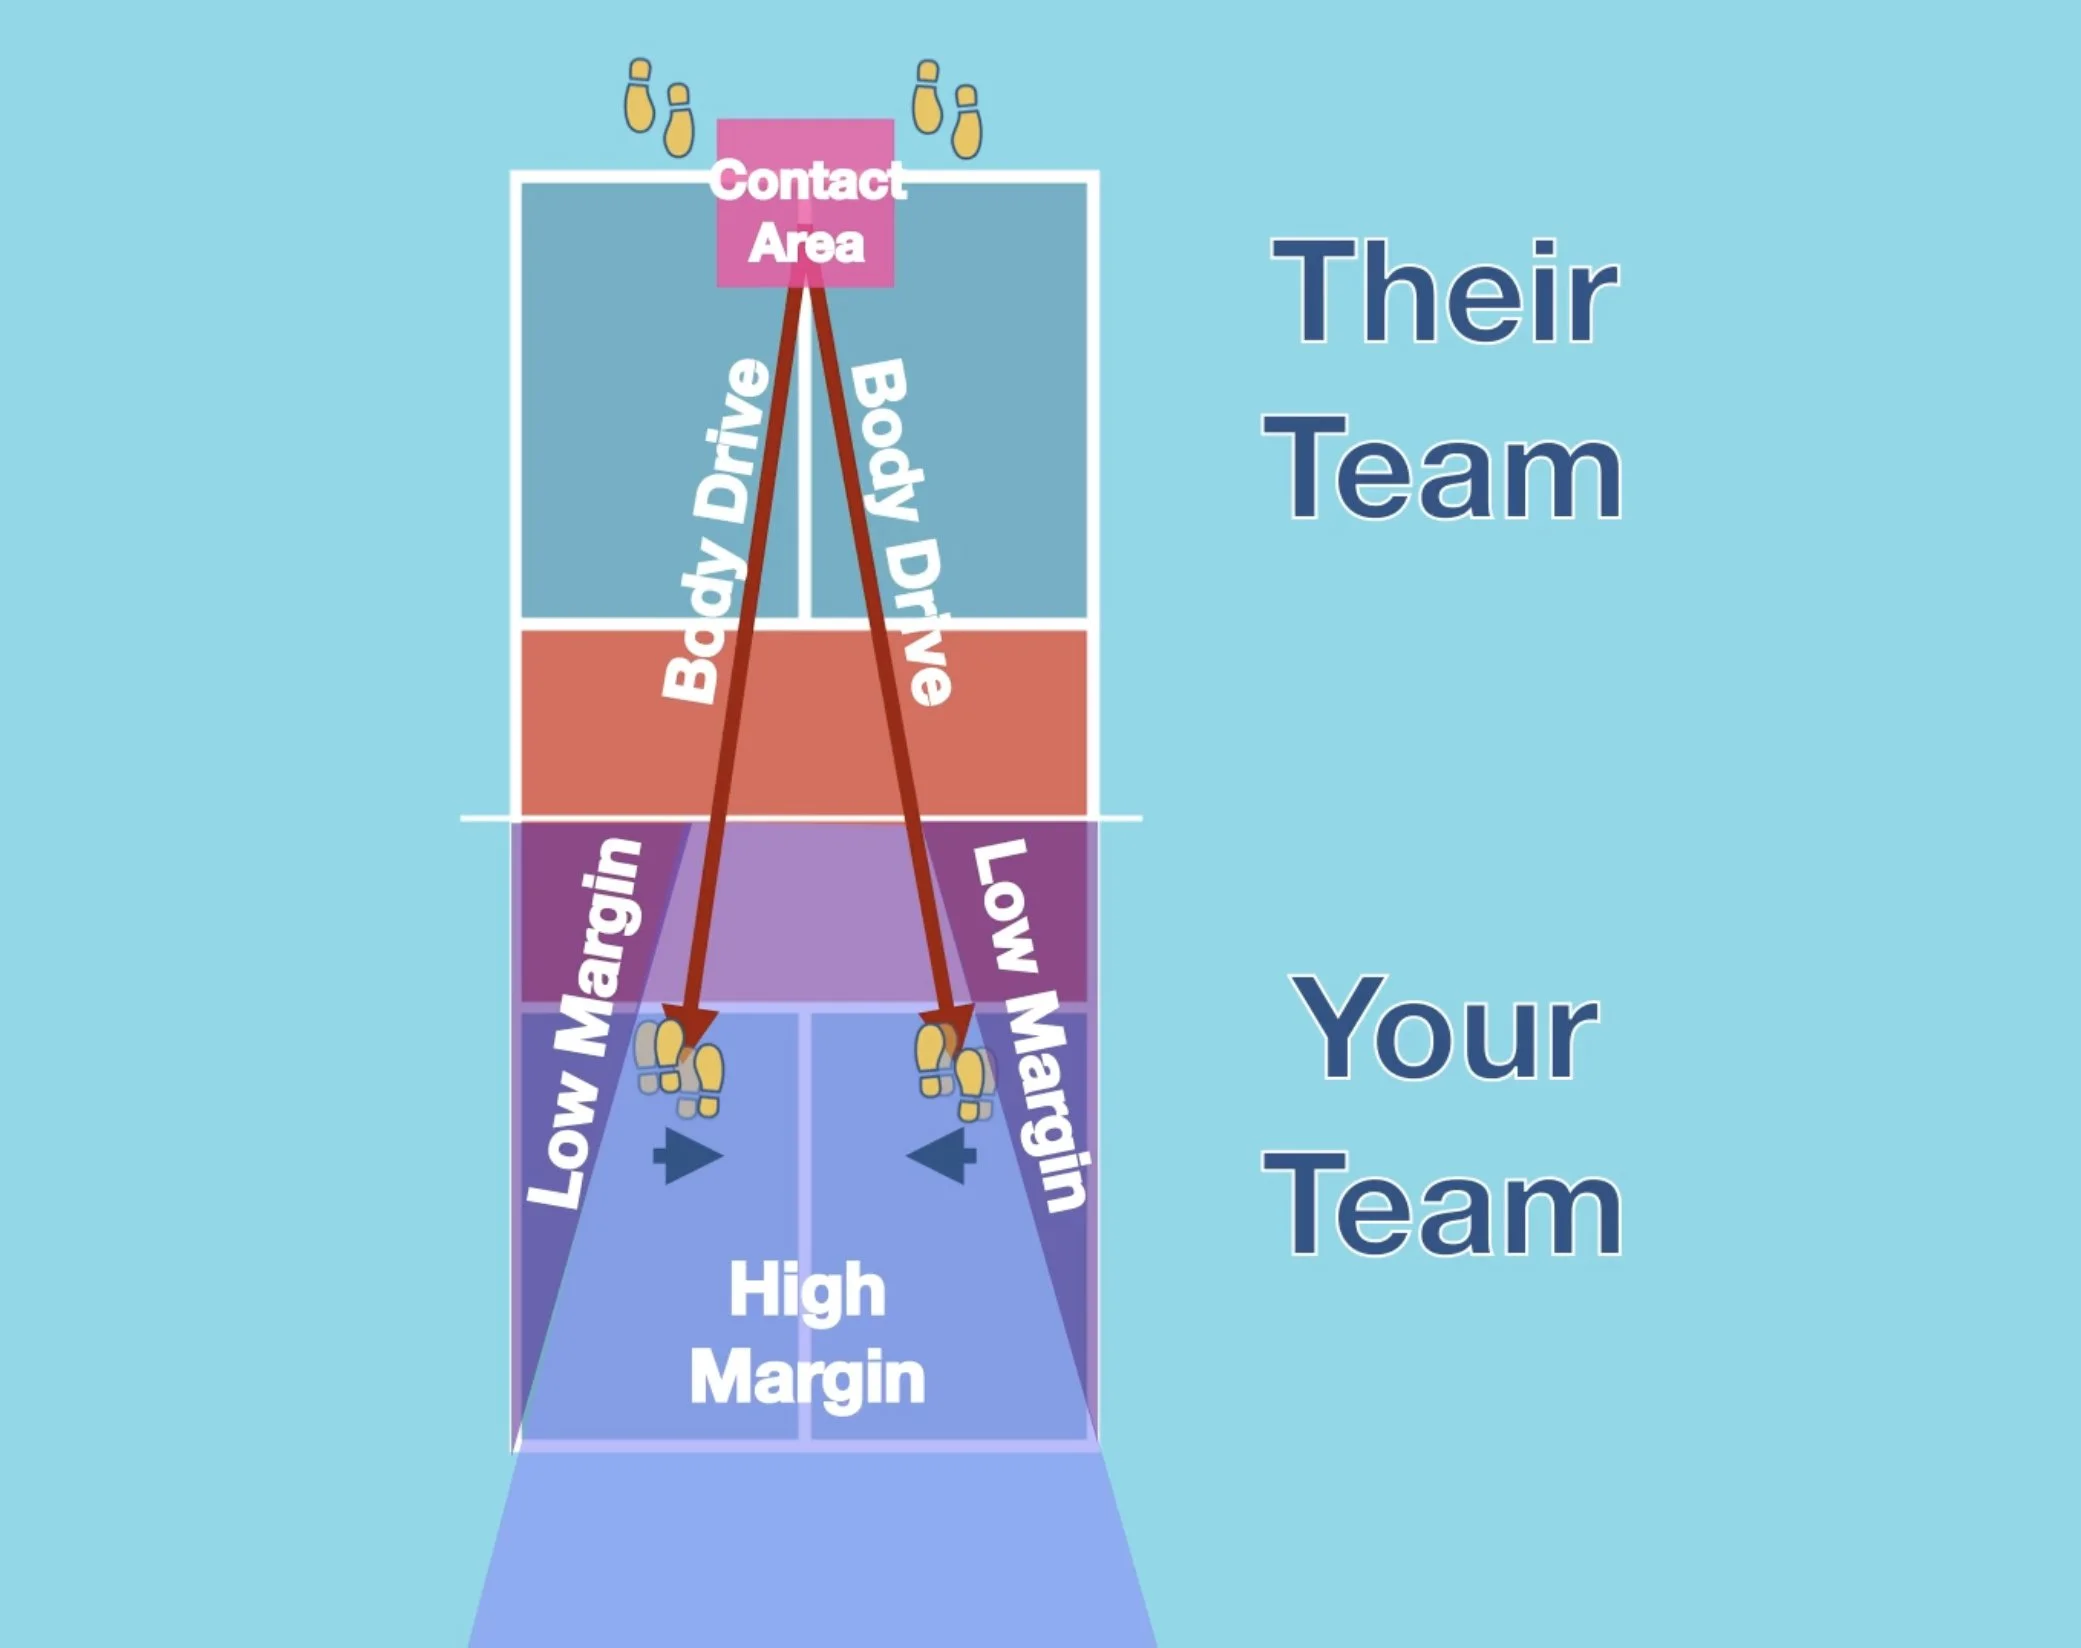
It’s Ok to have a slight stagger after the serve and return as your team works its way up to the NVZ line… but maintaining a large stagger will cause a large gap for your opponent to attack. This is to be avoided through Vertical Shading.
Vertical Shading will prevent the large stagger gap from happening.